Guide to Shotgun Chokes
Learn everything you need to know about shotgun chokes with this comprehensive guide. Explore the different types, how they affect your shot patterns.
Learn how to pattern your shotgun for improved accuracy and performance. This guide covers the essentials of setting up a patterning target, analyzing shot distribution, and adjusting your shotgun for optimal results.
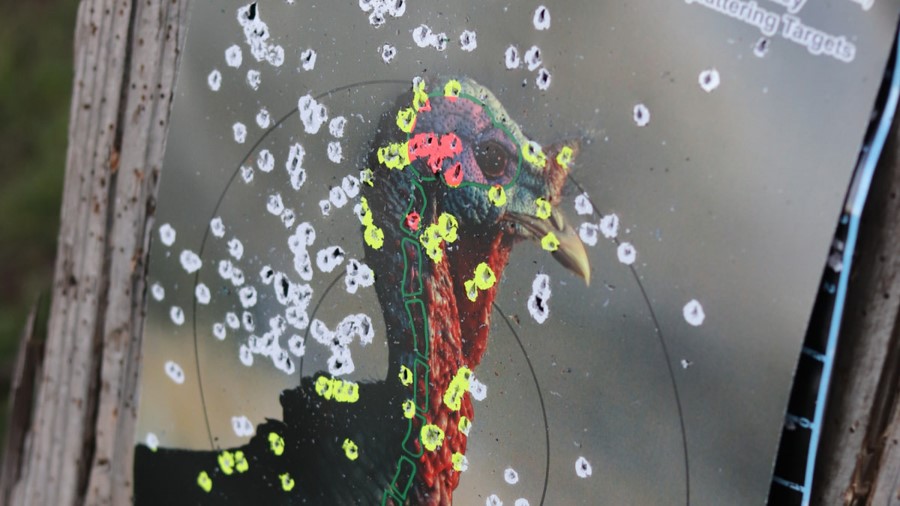
Don't miss the bird! Patterning a shotgun involves determining how the pellets from the shotgun shell are distributed on a target at a specific distance. This is important for understanding the shotgun's effectiveness and for selecting the right choke constriction and ammunition for different shooting scenarios. Here's how to pattern a shotgun:
What You'll Need:
Steps:
Prepare Your Shooting Range:
Choose Your Distance:
Set Up Your Target:
Mark the Target:
Shoot the Shotgun:
Examine the Pattern:
Analyze the Pattern:
Adjust Choke and Ammunition:
Repeat if Necessary:
Document Your Findings:
Patterning your shotgun helps ensure that it performs optimally for your intended shooting activities, whether it's hunting, trap shooting, or sporting clays. Remember to always follow firearm safety rules and regulations when handling shotguns and ammunition. Check out our post on shotgun chokes HERE.

Learn everything you need to know about shotgun chokes with this comprehensive guide. Explore the different types, how they affect your shot patterns.
Myth busting time. Yes, you need to aim your shotgun when shooting at a target. Shot spread helps but it all depends on the distance.
Discover the different types of shotgun loads and how they impact your shooting performance. From birdshot to buckshot and slugs, learn which load to...